Monday 22 November 2010

Rocket, Moon and Astronaut Space Themed Cake


This weekend was hectic in the best possible way, lots of family and fun!! It was Mr.Colehill's nephew's fourth birthday party, and I (somewhat bravely) offered to make the cake for the occasion, and here is the finished article!! I'm quite pleased with it since it's only my second go at cake decorating - the first being the baby cake for the birthday boy's new baby brother a few months ago.


I definitely want to take a course at some point to learn the tricks of the trade and improve on the basics and foundations of cake decorating, but for a new hobby and a fairly ambitious idea I'm happy with it. If anyone knows of any good courses that run I'd appreciate some tips!!
Both the moon and the rocket are entirely cake - a vanilla sponge with chocolate buttercream, and the astronaut is modeled out of sugarpaste. hope you like it!!

Thursday 11 November 2010

Nigella's Devil's Food Cake


All hail Nigella, she's done it again. I recently bought her latest book Kitchen without having read any reviews, without flicking through it first, and without umm-ing and ahh-ing over it as I usually do with a hefty new cookbook. Should I have been a little more cautious before racing to the counter? A resounding no. It's a triumph and an absolute gem of a book to read, let alone use any of the recipes. There is a beautifully written introduction and a lengthy section on utensils worth having, and perhaps more importantly, gadgets absolutely not worth having. I hold my hands up to making some of the same purchasing errors as her, but it's so tempting at the time!!

Anyway, I couldn't wait to get started and have a go at some of her recipes, and yes I know this is utterly predictable, but I went straight to the desserts chapter and landed satisfyingly on her Devil's Food Cake. If you are on a diet, this is not for you. However if you enjoy a hefty dose of chocolate and cake, then do not hesitate to make this little (or rather large) beauty.


Devil's Food Cake
50g cocoa powder, sifted

100g dark muscovado sugar
250ml boiling water
125g soft unsalted butter
150g caster sugar
225g plain flour
1/2 tsp baking powder
1/2 tsp bicarb
2 tsp vanilla extract
2 eggs

Frosting
125ml water
30g dark muscovado sugar
175g unsalted butter, cubed
300g dark chocolate

Preheat the oven to 180 degrees and line 2 sandwich tins.
Put the cocoa and muscovado sugar into a bowl and add the boiling water, set aside.
Cream the butter and caster sugar until pale and fluffy.
Sift the flour, baking powder and bicarb in another bowl, set aside.
Add the vanilla extract to the butter mixture, still mixing, then the eggs one at a time.
Keep mixing then add the flour mixture, then fold in the cocoa mixture.
Divide between the two tins and bake for about 30 minutes or until a skewer comes out clean.

For the frosting put the water, muscovado sugar and butter in a pan and melt over a low heat.
When it begins to bubble take off the heat and add the chopped chocolate, leave for a minute to melt before whisking till smooth and glossy.
Leave for about one hour, giving it a whisk every now and then.
When the cakes have cooled and the frosting is ready, put some frosting between the cakes, then cover with the rest.

Although Nigella suggests an hour is long enough to set the frosting, mine wasn't ready at this point and I needed to speed up the process so I put it in the freezer for 5 minutes. I did the trick, however I sacrificed the glossiness that the frosting should have had for speed. I would suggest making the icing before you make the cake and give it plenty of time to firm up at room temperature.


Utterly delicious and dangerously moreish, I highly recommend this cake. This was demolished within 48 hours, leaving only some rather snug waistbands and a smattering of crumbs on the plate!

Friday 17 September 2010

Rachel Allen's Chocolate and Vanilla Semifreddo


As you may know if you've happened to skim over the 'About Me' part of this blog, I've worked as a pastry chef, and I have to say that the thing I miss most and really struggle to make outside of the confines of a professional kitchen is ice cream. In the restaurant, I had a massive industrial type ice cream churner, and made freshly churned ice creams and sorbets every day, which were beyond delicious. We had chocolate, vanilla, tonka bean, pistachio, coconut, raspberry, pear, passion fruit, coffee...the list is endless, and each one was smooth and soft, set but yielding, and utterly irresistable.

After I left, I really missed freshly made ice cream so I bought a do-it-yourself-at-home gadget for churning ice cream. It's a fairly teeny little device that holds a litre of ice cream, and churns while in the freezer, working off a battery. Sounds great huh? Well, take my advice - don't bother wasting your money on one. Seriously. It made patchy uneven ice cream, some parts frozen, some still liquid, with ice crystals all the way through it. Not delicious.

So what's a girl with an ice cream craving to do? Good old Rachel Allen to the rescue again, I found a recipe for semifreddo in her book Home Cooking, a resident life saver in my kitchen, and it was a real success.

Semifreddo
3 eggs, separated
150g caster sugar
500ml double cream
200g dark chcolate, finely chopped

Line a loaf tin with 2 layers of cling film, with plenty extra over the sides so that you can fold it over to cover the semifredo when freezing.
Whisk the egg yolks and sugar in a large bowl until pale and fluffy.
In a separate bowl, whisk the cream until you have soft peaks.
In yet another bowl, whisk the egg whites until they form firm peaks.
Gently fold the cream into the yolks and sugar, then fold the egg whites into the mixture, being careful not to knock out the air you've whisked in.
Sprinkle a third of the chopped chocolate into the bottom of the loaf tin, then pour on half of the semifreddo mix. Then sprinkle a second third of the chocolate on top of this, then the remaining semifreddo mix, anf finally the last of the chocolate.
Fold the cling film over the top so that it's all covered, then freeze for at least 6 hours.

To go along with this, Rachel suggests a hot chocolate sauce, a pretty fine suggestion if you ask me!

Hot Chocolate Sauce
75g dark chocolate, chopped
100ml double cream

Melt the chocolate in a heatproof bowl over simmering water, then whisk in the cream to give a smooth sauce.

The trick is here to have the cream and chocolate as close in temperature as possible before combining them, so let the chocolate cool, a bit after melting, and don't have the cream fridge cold.

This is a really delicious alternative to ice cream, and it softens so beautifully when it's been out of the freezer a few minutes. It doesn't melt exactly, but becomes the semifreddo it's meant to be - half frozen. It has a firm texture, but the smooth creaminess really comes through and is utterly beautiful...and dangerously moreish! Perfect for a dessert after a fairly heavy meal as portions are flexible and the whipping keeps it fairly light, and is a great standby to have in the freezer if you have people over at short notice and need a delicious pudding!!

Sunday 5 September 2010

Orange Madeira Loaf Cake


It's been a hectic few weeks and I've abandoned the blogosphere since the New Baby Cake which kind of took it out of me to be honest! Anyway, I finally found time to get back in the kitchen and made something considerably less complicated yet utterly delicious. It's a Rachel Allen recipe from her Home Cooking book which I love, I've mentioned it in previous blog posts and really rely on it as a go-to whenever I'm lacking in inspiration; in fact, it is probably second only to Hugh Fearnley-Whittingstall's Everyday book in terms of how often it gets used at Colehill Kitchen.

This time it was a lovely warming orange loaf cake, perfect now that the weather is cooling off, but not in the realms of dense wintery fruit or chocolate cakes. It's a nice change from the traditional lemon drizzle cake, but no less delicious.

Orange Cake
175g butter, softened
175g caster sugar
3 eggs
Zest of 2 oranges
225g plain flour
1 tsp baking powder
4 tsp freshly squeezed orange juice

Cream the butter and sugar until pale and fluffy. I used part golden caster sugar and part normal caster sugar, but it's entirely up to you!
Add the eggs one at a time, beating well between each one, then add the orange zest.
Sift the flour and baking powder then fold in with the juice, stopping as soon as all the flour is combined.
Transfer into a greased and lined loaf tin, then smoth out the top.
Bake in the oven at 170 degrees for 50-55 minutes until a skewer comes out clean.
Allow to cool on a wire rack.

The icing in particular went down a storm, which was simply 75g icing sugar and 2-3 tbsp of freshly squeezed orange juice. Combine the juice with the icing sugar gradually until it is soft but not runny, then spoon over the cake.


Slice and enjoy with a cuppa for the perfect afternoon tea!

Friday 13 August 2010

New Baby Cake!!


This is an exciting post for me, because this is my first ever attempt at cake decoration in this way. I've always stuck to buttercream frosting and simple cakes, but this is a special occasion, so I tried my hand at something a little more detailed. The occasion in question is a beautiful baby boy, Mr. Colehill's new little nephew, and I wanted to do something special for the event. However, that is easier said than done because I've never done it before. This has been a week in the making in the evenings after work, starting with designing, making the sugarpaste decorations, baking the cake and finally assembling.


Anyway, here is the final product - The cake is layers of chocolate sponge and victoria sponge, with white chocolate buttercream between each layer. The building blocks are also cake, but the rest of the decorations are made out of sugarpaste.


I'd say this is my proudest achievement to date, I'm really pleased with the way it came out, but of course I'd love to hear ny tips and tricks you may have for cake decorating!!
P. S. excuse the milk bottle coming off at the side, it needs to be fixed on firmly before I give it to the new family!!

Monday 9 August 2010

Julia Child's Quiche Lorraine


A rare savoury recipe has snuck on to Colehill Kitchen this week, a shock I'm sure, but at least it involves pastry!! Mr. Colehill is quite the quiche connoisseur, and while I was flicking through Julia Child's book, Mastering the Art of French cooking, which was a gift from him, he decided that the first recipe used from it should really be a 'gift' for him. I can hardly disagree. And so, a plan to make quiche was born.

I assumed it would be really time consuming for some reason, probably the notion of making pastry from scratch, but it was fairly simple quick and very simple to make. The pastry is a standard recipe, no surprises there. It's written in ounces so that's how I'll do it here:

Pastry:
5oz plain flour
1/2 tsp salt
Pinch sugar
4oz chilled butter, cubed.
4-4.5 tblsp cold water

Sieve the flour, salt and sugar into a large mixing bowl, add the butter and rub together quickly until you get and oat flake texture, careful not to overdo it though.
Then add the water and blend quickly shaping into a ball, before tipping out onto a surface and make one kneading motion for the final blending of fat and flour, the fraisage.
Leave to rest in the fridge for at least half an hour, or until needed.
Roll out and lay in a greased tin, and blind bake for 8 to 10 minutes until it is becoming golden.

Filling:
3 - 4 oz lean bacon
3 eggs
1/2 pint double cream
1/2 tsp salt
pinch pepper
1/2 - 1 oz butter cut in to little dots.


Cut the bacon in to bitesize pieces and blanch in fresh water for a couple of minutes, drain and pat dry. Fry in a pan until crispy and slightly golden - I was too impatient at this step and should have fried them longer. Then place in the pastry case.

Combine the eggs, cream and seasoning in a jug and pour over the bacon, and dot the top with the butter. Bake in the oven at about 180 degrees for 25 to 30 minutes, or until the top is beginning to brown.

Although it isn't traditional, I added a handful of grated cheese into the egg and cream mix, yum!...we are lovers of cheese at Colehill Kitchen!

I have to say I would probably leave out the extra butter on top, as it resulted in a patchy surface to the quiche. As well as this, I think I would use half and half double and single cream next time too, as all double cream is just a tad too rich for my taste!

Leave to sink a little while it cools, and enjoy!! This of course is lovely cold too with salad and other chilled foods. Perfect for sitting in the garden sipping a cold glass of white wine!

Monday 26 July 2010

Nigella's Chocolate and Nut Brownies


I've been on a hunt recently, a hunt for the best brownie. There are about a billion squillion recipes out there for brownies, and I really wanted to find one worth keeping hold of for those times when nothing else will do but dense, chocolatey, soft, squidgy brownie. You know the moments... when it's cold and gloomy outside and you want a hot mug of tea and something heavy and indulgent, or when you've had a hard day at work and you really deserve a treat, or, you know, when it just tickles your fancy - no excuses necessary!! Anyway, I tried a recipe recently and it was pretty pants if I'm honest. It was a dark and white chocolate swirl brownie and I could just tell as soon as I'd made the batter it was going to be rubbish. Thick and gungy, and kind of oily, just bad bad bad. So, I promised myself, and those who suffered the tantrum when the brownie making didn't go so well, that I'd find a stonking good recipe to make up for it.

I scoured the internet, I trawled through my books, I asked around... and eventually I came across what I really should have gone looking for in the first place: Nigella. You know that I love Nigella, and one of the reasons I love her is because she is oh-so-good at coming up with recipes that are completely indulgent, without feeling bad about it. She knows if you're looking for a brownie recipe, you want it to be rich, heavy, gooey in the middle and choc-tastic. None of this fancy malarkey, she even admits trying to posh up the brownies with pistachios but it doesn't work, and we all know why: brownies aren't posh. They are the opposite of posh. A good brownie should leave your fingers a little sticky, and they should not be eaten in front of someone you want to impress (say, a first date). A brownie should not be eaten delicately, but demolished in warp speed. This is not a mille-feuille or a delicate little tart people, this is the land of over-the-top, completely indulgent, naughty, messy pudds. Oh, and she also knows that if you are making these sqaures of wickedness, you want a lot of them, which is why the recipe makes enough to feed an army...or you know, 3 or 4 greedy people.


Chocolate Brownie:

375g unsalted butter
375g dark chocolate
6 eggs
500g caster sugar
225g plain flour
1 tsp salt
300g chopped walnuts

Melt the chocolate and butter together in a heavy-set pan, stirring regularly to avoid it catching on the bottom.
In a jug, combine the eggs and sugar, and in another separate bowl sieve together the flour and salt.
When the chocolate mixture has melted and cooled slightly, beat in the eggs and sugar, then the flour and nuts. Beat until smooth then pour into a lined tin, about 33 x 23 x 5.5 cm.
Bake at 180 degrees for about 25 minutes, but keep an eye from 20 minutes onward. The top should be pale speckled with dark brown, and will still have a little wobble in the middle. It will be quite soft but have faith in your convictions and get it out of the oven! The difference between soft gooey brownie and dry crumbly brownie is only a minute or two in the oven after all!
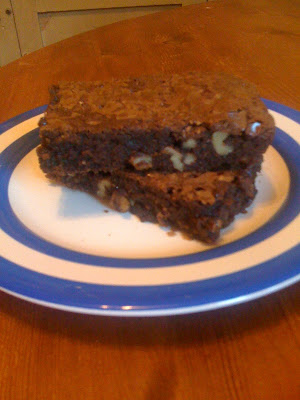
Leave to cool as long as you can before slipping the giant slab out of the tin and slicing into hearty wedges!!

You could add any kind of nuts (don't go posh though - Nigella said so!!), dried fruit such as dates or apricots, seeds, whatever really, but I like the basic recipe of dark chocolate and walnuts. The crunch is key here, the brownie should be so soft and squidgy that the walnuts give it a bit of solidity and texture...when you take a bite and find a walnut encased in soft brownie, the combination is utterly divine.


I definitely suggest making the quantity specified here - trust me, you'll never be short of takers. Intensely rich yet frustratingly moreish, these are a winner across the board. No one, and I mean no one, can resist a good old wedge of brownie.

Wednesday 21 July 2010

Oatmeal and Raisin Cookies

More delicious and delectable delights from the Hummingbird Bakery Cookbook you'll be pleased to hear!! After the Cheesecake and Blueberry Cake I thought I'd try something equally tempting but a little less artery-clogging next. So I flipped straight to the cookies section and settled fairly quickly on these treats. They went down a storm yesterday, I came in to work with a fairly hefty box full of them and my bag was considerably lighter on the way home...only a few crumbs left! Soft and chewy, they are the perfect mid-morning or afternoon snack, as my office colleagues will attest to!! One was converted to raisins after years of thinking she didn't like them, which I think is the highest achievement and greatest feeling of satisfaction possible when people try something you've made!!


Oatmeal and Raisin Cookies:
270g unsalted butter
160g caster sugar
160g soft dark brown sugar
2 eggs
380g plain flour
1 tsp salt
1 tsp bicarbonate of soda
1/2 tsp ground cinnamon
110g rolled oats
220g raisins
Cream together the butter and sugars, before adding the eggs one at a time.

Sift together the flour, cinnamon, bicarbonate of soda and salt, then mix in the oats.

Combine the dry ingredients with the butter, sugar and eggs, before mixing in the raisins.

Place balls of dough slightly smaller than a golf ball on to a baking tray, leaving plenty of space between each one to allow them to spread, and bake in the oven at 170 degreees for about 12 minutes.

As is usual with cookies, be brave and take them out when they are only just turning golden. They will still be very soft and need a delicate touch so that they don't fall apart when you transfer them on to a wire rack to cool. Leave for a few minutes until they are solid enough to pick up, then munch away!!


These cookies really are lovely. Raisins of course add to the sweetness and chewy-factor, and are hugged by soft cookie in which the cinnamon flavour is very delicate, just enough to give a warming flavour to the cookies, and the addition of brown sugar gives a slightly toffee-ish essence.
A doddle to make and perfect with a nice cup of tea, you can't go wrong!!


Wednesday 14 July 2010

Gooey Chocolate Cake


Here I am again with another Hugh Fearnley-Whittingstall recipe… I hope they aren’t getting tedious, but I just love his food as well as his ideology so much! I think I might get an ‘I heart Hugh F-W’ t-shirt printed one of these days… anyway, I digress!!

Here is another success from his Everyday cookbook, and is a little different from the normal chocolate cakes you get. It’s made with almonds in the mix which gives it a lovely moist texture as well as a sort of warm taste if you know what I mean. There’s something really comforting about almonds, and whenever they sneak in to a recipe you really can tell, there’s a certain flavour that sort of envelopes you, they make the dish that little bit more luxurious and rich without overwhelming you. I don’t know if I’m explaining this very well, let’s just say they bring a certain je ne sais quoi to the cake!!
As well as this, the cake isn’t really a cake… I’m worried I’m going to lose you here, but bear with me! This is a good thing!! Instead of a run-of-the-mill sponge, this one is kind of gooey inside due to the lack of flour and when warm it’s a little difficult to tame but wonderfully smooth, soft and sticky, and then when it’s been cooling for a few hours and comes to room temperature – Oh. My. God!! The mix of brown sugar with caster sugar gives it a wonderfully caramelly flavour and it’s like chocolate fudge encased in chocolate cake! Completely delicious and oh-so-moreish!!


Chocolate Cake:

250g dark chocolate
250g unsalted butter
4 medium eggs, separated
100g caster sugar
100g soft light brown sugar
50g plain flour
50g ground almonds


Melt the chocolate and butter in a heatproof bowl over a pan of simmering water.
Whisk the egg yolks with the sugar until well combined, then add the melted chocolate and butter to the yolk mix.
Combine the flour and almonds then fold these in too.
In a separate bowl whisk the egg whites until they form firm peaks.
Stir in one spoonful of whites to the chocolate mix to loosen it, then continue to fold in the rest of the whites, careful not to knock out the air.
Put the mixture into a prepared baking tin anf bake at 170 degrees for 30 minutes, until only just set. Take it out when there is still a wobble in the middle - this will result in the sticky gooey texture I was raving about!!
Leave to cool on a wire rack before turning out of the tin.
Dig in!!!


It isn’t decorated with anything; no frills, no frosting, nothing, and honestly – it’s at its best this way. The texture is too delicate to sustain any buttercream, and the flavour of the almonds with the chocolate really shines and would be completely overwhelmed by any heavy frosting.

I don’t think this is a special occasion cake, it’s more of an ‘I need a cup of tea and a treat’ type of cake. It’s not decadent and fancy, but humble and utterly satisfying, enjoy!!

Friday 9 July 2010

Hummingbrid Blueberry Cake


This week I decided a knock-your-socks of cake was in order. I've been on a rather more delicate trend with my baking exploits recently with Lemon cake, Snickerdoodles, and Bakewell Slices. Even the heavier desserts I’ve made like the Cheesecake and Chocolate Mousse Cake haven’t been sponge based, and I had a real hankering for a proper cakey cake if you know what I mean!! With tons of icing and everything!!

So I asked myself, which recipe book that I own is most likely to contain lots of delicious cakes? Clearly Hummingbird was the only answer!! Despite wanting a big old cake, with all this lovely hot weather I wasn’t quite in the mood for chocolate, and berries seemed the obvious choice of flavouring. This cake is baked in a ring shape in the Hummingbird book, however I don’t own one of those (yet!) so my reliable old round cake tin had to make do!!

It’s no ordinary cake recipe; the ratio of eggs, butter, sugar and flour is nothing like any other cake I’ve made – for starters there are SIX eggs!! … and then the very healthy addition of sour cream, which, you know, I have no problem with!!


Blueberry Cake:
350g unsalted butter
350g caster sugar
6 eggs
450g flour
2 tblsp and 2 tsp baking powder
280ml soured cream
250g fresh blueberries plus extra to decorate

Cream the butter and sugar until pale and fluffy, then add the eggs one at a time.
Beat in the sifted flour and baking powder until well mixed, then add the soured cream and mix well until liht and fluffy.
Gently stir in the blueberries and pour into a tin and bake at 170 degrees for 40 minutes or until a skewer comes out clean.
Leave to cool on a wire rack. When completely cooled cover with the cream cheese frosting and sprinkle with blueberries.

Cream Cheese Frosting:
600g icing sugar
100g unsalted butter
250g cream cheese

Combine the icing sugar and butter until well mixed, before adding the cream cheese and beat until light and fluffy.


The blueberries all sank to the bottom of the mix while it was baking which was disappointing, but I was more grumpy with myself because I completely forgot that a good way to avoid this is to quickly toss the berries in flour before mixing them into the batter. A handy hint for if you decide to make it!! Anyway, all was not lost because I turned the cake upside down to ice it, which resulted in almost a layering of sponge, then a really moist and berry-heavy section before hitting the cream cheese frosting…deeeeee-licious!!!

I’m not completely convinced by this cake; I think there are better sponge recipes out there, however I did want a really dense cakey-cake and that’s exactly what I got! As for its aesthetics, the snowy white of the frosting looked beautiful speckled with deep navy blueberries, and I did like the way the colour from the layer of blueberries bled into the pale yellow sponge dappling it with a deep purple which faded in to a paler lilac colour.


This is definitely a heavy cake, in typical Hummingbird fashion – they don’t do anything by halves!! I would say it’s probably best as an afternoon tea type of thing rather than dessert – I just can’t imagine ever having enough room for this cake after a meal! Either way though, completely indulgent and berries add a summery touch, enjoy!!


Monday 5 July 2010

Nigella's Snickerdoodles


Sometimes, because I'm a bit of a loser, I like to browse through my old blog posts. Sometimes to find recipes I want to make again, but more often than not, I have a peruse because I like to see the change in it. I like to see how at the beginning it was quite clear I was just getting to grips with blogging; the writing, the photos, the layout, and over the last year I would like to think that my posting has improved, I love to see the increase in the amount of you that comment and chat, and I'm a little more comfortable in this little space of mine.

However something had been bothering me as I glanced over old blog posts recently, and I couldn't quite figure out what it was. It was nothing that stood out and screamed 'Umm, Becca, Hello?!?! This is wrong!!', nothing conspicuously incorrect or missing, and I just couldn't put my finger on what was. Then it hit me. Nigella. Oh, Nigella, how could I possibly have neglected you so?! As I scrolled through my posts, I realised there was just one lonely little post on a Nigella recipe. One. Now, you may not know this, (chances are you don't since I have carelessly disregarded her books on this blog) but I'm a Nigella devotee, so this is qute an upsetting revelation for me. I have loved Nigella for years, my cookbook collection has ended up including several of her books which I love, and I look forward to her television programmes when we are treated to them. She epitomises home comforts, she shows luxurious food without being ostentacious, and never apologises for her indulgences. And on top of all these home-making efforts, and the importance she clearly places on her family, she has managed to become a successful businesswoman in her own right. Superwoman or what? Anyway, the point of my waxing lyrical about Nigella is this: I haven't written about enough of her recipes here, and I plan to rectify the situation!


So I thought I'd start with something fairly simple but utterly gratifying and enjoyable: Snickerdoodles, or as Mr. Colehill insists on calling them, Snickerdimdums. Don't ask me why, sometimes it's just better to nod along...


These are remarkably simple and quick to make,and the warming smell of cinnamon and nutmeg is completely divine, not to mention the sweet crumbly texture which is truly delightful and very very moreish! Nigella describes them as sort of a baked doughnut, shall we say a 'healthier' version or is that pushing it a little?! Mine were a little crumblier than I expected from the 'doughnut' comparison but perhaps I baked them a minute or so too long. Either way, they weren't exactly snubbed by the hungry mouths around me, and I don't think anyone had a problem with the more biscuit-y texture.


Snickerdoodles
125g unsalted butter
100g caster sugar plus 2 tblsp
1 egg
250g plain flour
1/2 tsp nutmeg
1/2 tsp salt
3/4 tsp baking powder
1 tblsp ground cinnamon


Combine the flour, nutmeg, salt and baking powder and set aside.
Next, cream the butter and 100g caster sugar until pale and fluffy, then beat in the egg.
Now beat in the flour until you have a soft and smooth paste/dough.
Combine the rest of the sugar and cinnamon on a plate.
Roll walnut sized pieces of dough in the suagr and cinnamon before placing on a lined baking tray.
Bake in the oven at 180 degrees for about 15 minutes when they should be turning a pale golden brown.
Leave to cool on a wire rack.


I challenge you to stop eating these without either removing yourself from the room or the Snickerdoodles from eyesight!! These biscuits are pretty much perfection in my eyes. They aren't too over the top, just right for an afternoon snack with a cup of tea. Obviously there is room for your Hummingbird type hit-you-over-the-head-with-chocolate Double Chocolate Cookies, but sometimes something a little more refined is in order. And we at Colehill Kitchen are British after all; it's in our nature to get over-excited about a little treat, as Bill Bryson has so aptly pointed out!! So here's to a dainty little morsel of perfection, courtesy of Nigella...I think she would throughly approve of a little indulgence!


Thursday 1 July 2010

Hummingbird Bakery Chocolate Cheesecake


Ok, so I'm back on the chocolate bandwagon in a big big way, I know. This is possibly one of the most chocolate heavy desserts you could make, but it was a celebratory dessert!!! Well that's my excuse anyway. The oven at Colehill Kitchen has always been a bit of a disaster zone; it doesn't seem to have temperature control, so once you turn it on it just keeps getting hotter and hotter and hotter until it's like a furnace in there. This is great for bread making when you want the oven ridiculously hot, but it makes baking large cakes a real challenge (think black cinders on the outside, raw batter on the inside) and anything that needs a cool oven an absolute no-no. But a few days ago we got a new oven, YAYYY!!!! And what's the yummiest thing that needs a cool oven? Umm, hello? Cheesecake!


As well as the other Hummingbird recipes I've made, I've made this cheesecake before, about a year ago, and it really is rather huge. But it went down a storm with everyone (no surprise there really!) so I knew there would be no problem getting rid of this beast, and I was not wrong!! Despite the almost unbearable heat over the weekend, a third of the cheesecake was swiftly demolished, and now there are but a few crumbs left to prove it was ever there!!

Chocolate Cheesecake
Base:
200g digestive biscuits, finely crushed
2 tbs cocoa powder
150g unsalted butter, melted

Filling:
900g cream cheese
190g caster sugar
1 tsp vanilla extract
4 eggs
200g dark chocolate, roughly chopped


The base is your usual biscuit base. Melt the butter then mix it into the crushed biscuits and cocoa powder before pressing into a a 23cm round springform cake tin, greased and base-lined with greaseproof paper. Leave this to chill and harden in the fridge while you make the filling.

For the filling, melt the chocolate in a bowl over simmering water, then set aside to cool slightly.

Meanwhile beat the cream cheese and caster sugar until thick. Add the vanilla extract and the eggs one by one, beating until fluffy. Careful not to overdo the mixing though or the cheese may split.

Then spoon on blob of cheese mix into the melted chocolate and mix, then a couple more dollops to bring both mixes to similar temperatures, before finally combining the lot and mixing until it is all an even colour.

Pour onto the base and bake in the oven for 40-50 minutes. Check it after 40 minutes to keep an eye out for burning around the edges, and take it out while there is still a wobble in the middle. Be brave about this!! If you leave it in too long the filling will be dry and crumbly, this you do not want - smooth and creamy all the way!!

Leave to cool and ideally chill overnight...if you can hold off that long!!


This recipe from the Hummingbird Bakery cookbook is competely over the top, rich and dense but not ridiculously heavy. Perhaps not the ideal dessert for a tropically hot and humid weekend but hey, it was a special oven-related occasion!! We deserved cheesecake after all this time!!