Showing posts with label Chocolate. Show all posts

Wednesday, 2 February 2011

Dedication Cake


Here is my latest attempt at cake decorating, it was for Mr. Colehill's nephew (for whom the New Baby Cake was for in August) who had his dedication last weekend. It was a lovely occasion, with all eyes and attention on the beautiful boy.


This is the first time I've been 'commissioned' to do a cake as it were, as opposed to just deciding to make one, so I was pretty excited to say the least
!!

The cakes were layers of chocolate and victoria sponges, with white chocolate buttercream between each layer and between the sponge and the royal icing. The baby in the basket and building blocks were pure icing...not to be given to any children for fear of some extremely hyper-active playing and probably some very tired parents at the end of the day
!!


Hope you like it, this could be the beginning of a beautiful business :-)

Friday, 14 January 2011

Chocolate Orange Cookies


It's always exciting to try new recipes, and even more so to tweak recipes in your own individual way to make something extra special, but for me, the most exciting thing is to create a recipe that's completely your own. This is the first sweet recipe that I've ever invented myself, and as something from the baking realm it was quite daunting - things can go so easily wrong (and trust me, they did a couple of times) but when it works you get the greatest sense of achievement, well, in my opinion anyway.

So here's my little creation: Chocolate Orange Cookies. They're sort of cracked and glossy on the top and soft and squidgy in the middle - my ideal texture for a cookie. The orange flavour comes through quite strongly which is just my own taste, and the slightly bitter tones of the dark chocolate really set of the sweetness of the orange beautifully.

Chocolate Orange Cookies
300g dark chocolate
50g butter
2 eggs
170g soft light brown sugar
half a teaspoon of baking powder
125g plain flour
Zest of 2 oranges

Juice of half an orange

Preheat your oven to 170 degrees.
Melt the butter with
200g of the chocolate, set aside. Chop the remaining chocolate into chunks.
Beat the eggs, sugar and zest until pale and fluffy, then add the melted chocolate mixture.
Sieve in the flour and baking powder and combine.
Add the orange juice and the remaining dark chocolate chunks, then spoon on to a lined baking tray and bake for 0-5 minutes until they are beginning to crack on the top.
Leave to cool on the baking tray for a few minutes before transferring on to a cooling rack as they'll be very fragile and near impossible to transfer at first.

I gave these to a friend as part of her Christmas present and she seemed to thoroughly enjoy them and told me that the rest of her family were fans too, so I'm thrilled - I hope you try them, and try your own recipes too :-)

Monday, 22 November 2010

Rocket, Moon and Astronaut Space Themed Cake


This weekend was hectic in the best possible way, lots of family and fun!! It was Mr.Colehill's nephew's fourth birthday party, and I (somewhat bravely) offered to make the cake for the occasion, and here is the finished article!! I'm quite pleased with it since it's only my second go at cake decorating - the first being the baby cake for the birthday boy's new baby brother a few months ago.


I definitely want to take a course at some point to learn the tricks of the trade and improve on the basics and foundations of cake decorating, but for a new hobby and a fairly ambitious idea I'm happy with it. If anyone knows of any good courses that run I'd appreciate some tips!!
Both the moon and the rocket are entirely cake - a vanilla sponge with chocolate buttercream, and the astronaut is modeled out of sugarpaste. hope you like it!!

Thursday, 11 November 2010

Nigella's Devil's Food Cake


All hail Nigella, she's done it again. I recently bought her latest book Kitchen without having read any reviews, without flicking through it first, and without umm-ing and ahh-ing over it as I usually do with a hefty new cookbook. Should I have been a little more cautious before racing to the counter? A resounding no. It's a triumph and an absolute gem of a book to read, let alone use any of the recipes. There is a beautifully written introduction and a lengthy section on utensils worth having, and perhaps more importantly, gadgets absolutely not worth having. I hold my hands up to making some of the same purchasing errors as her, but it's so tempting at the time!!

Anyway, I couldn't wait to get started and have a go at some of her recipes, and yes I know this is utterly predictable, but I went straight to the desserts chapter and landed satisfyingly on her Devil's Food Cake. If you are on a diet, this is not for you. However if you enjoy a hefty dose of chocolate and cake, then do not hesitate to make this little (or rather large) beauty.


Devil's Food Cake
50g cocoa powder, sifted

100g dark muscovado sugar
250ml boiling water
125g soft unsalted butter
150g caster sugar
225g plain flour
1/2 tsp baking powder
1/2 tsp bicarb
2 tsp vanilla extract
2 eggs

Frosting
125ml water
30g dark muscovado sugar
175g unsalted butter, cubed
300g dark chocolate

Preheat the oven to 180 degrees and line 2 sandwich tins.
Put the cocoa and muscovado sugar into a bowl and add the boiling water, set aside.
Cream the butter and caster sugar until pale and fluffy.
Sift the flour, baking powder and bicarb in another bowl, set aside.
Add the vanilla extract to the butter mixture, still mixing, then the eggs one at a time.
Keep mixing then add the flour mixture, then fold in the cocoa mixture.
Divide between the two tins and bake for about 30 minutes or until a skewer comes out clean.

For the frosting put the water, muscovado sugar and butter in a pan and melt over a low heat.
When it begins to bubble take off the heat and add the chopped chocolate, leave for a minute to melt before whisking till smooth and glossy.
Leave for about one hour, giving it a whisk every now and then.
When the cakes have cooled and the frosting is ready, put some frosting between the cakes, then cover with the rest.

Although Nigella suggests an hour is long enough to set the frosting, mine wasn't ready at this point and I needed to speed up the process so I put it in the freezer for 5 minutes. I did the trick, however I sacrificed the glossiness that the frosting should have had for speed. I would suggest making the icing before you make the cake and give it plenty of time to firm up at room temperature.


Utterly delicious and dangerously moreish, I highly recommend this cake. This was demolished within 48 hours, leaving only some rather snug waistbands and a smattering of crumbs on the plate!

Friday, 13 August 2010

New Baby Cake!!


This is an exciting post for me, because this is my first ever attempt at cake decoration in this way. I've always stuck to buttercream frosting and simple cakes, but this is a special occasion, so I tried my hand at something a little more detailed. The occasion in question is a beautiful baby boy, Mr. Colehill's new little nephew, and I wanted to do something special for the event. However, that is easier said than done because I've never done it before. This has been a week in the making in the evenings after work, starting with designing, making the sugarpaste decorations, baking the cake and finally assembling.


Anyway, here is the final product - The cake is layers of chocolate sponge and victoria sponge, with white chocolate buttercream between each layer. The building blocks are also cake, but the rest of the decorations are made out of sugarpaste.


I'd say this is my proudest achievement to date, I'm really pleased with the way it came out, but of course I'd love to hear ny tips and tricks you may have for cake decorating!!
P. S. excuse the milk bottle coming off at the side, it needs to be fixed on firmly before I give it to the new family!!

Monday, 26 July 2010

Nigella's Chocolate and Nut Brownies


I've been on a hunt recently, a hunt for the best brownie. There are about a billion squillion recipes out there for brownies, and I really wanted to find one worth keeping hold of for those times when nothing else will do but dense, chocolatey, soft, squidgy brownie. You know the moments... when it's cold and gloomy outside and you want a hot mug of tea and something heavy and indulgent, or when you've had a hard day at work and you really deserve a treat, or, you know, when it just tickles your fancy - no excuses necessary!! Anyway, I tried a recipe recently and it was pretty pants if I'm honest. It was a dark and white chocolate swirl brownie and I could just tell as soon as I'd made the batter it was going to be rubbish. Thick and gungy, and kind of oily, just bad bad bad. So, I promised myself, and those who suffered the tantrum when the brownie making didn't go so well, that I'd find a stonking good recipe to make up for it.
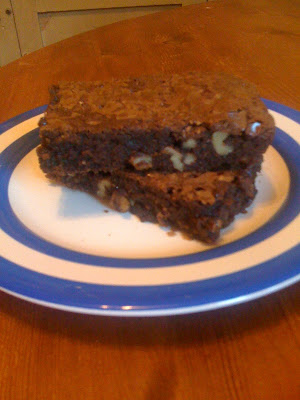
I scoured the internet, I trawled through my books, I asked around... and eventually I came across what I really should have gone looking for in the first place: Nigella. You know that I love Nigella, and one of the reasons I love her is because she is oh-so-good at coming up with recipes that are completely indulgent, without feeling bad about it. She knows if you're looking for a brownie recipe, you want it to be rich, heavy, gooey in the middle and choc-tastic. None of this fancy malarkey, she even admits trying to posh up the brownies with pistachios but it doesn't work, and we all know why: brownies aren't posh. They are the opposite of posh. A good brownie should leave your fingers a little sticky, and they should not be eaten in front of someone you want to impress (say, a first date). A brownie should not be eaten delicately, but demolished in warp speed. This is not a mille-feuille or a delicate little tart people, this is the land of over-the-top, completely indulgent, naughty, messy pudds. Oh, and she also knows that if you are making these sqaures of wickedness, you want a lot of them, which is why the recipe makes enough to feed an army...or you know, 3 or 4 greedy people.


Chocolate Brownie:

375g unsalted butter
375g dark chocolate
6 eggs
500g caster sugar
225g plain flour
1 tsp salt
300g chopped walnuts

Melt the chocolate and butter together in a heavy-set pan, stirring regularly to avoid it catching on the bottom.
In a jug, combine the eggs and sugar, and in another separate bowl sieve together the flour and salt.
When the chocolate mixture has melted and cooled slightly, beat in the eggs and sugar, then the flour and nuts. Beat until smooth then pour into a lined tin, about 33 x 23 x 5.5 cm.
Bake at 180 degrees for about 25 minutes, but keep an eye from 20 minutes onward. The top should be pale speckled with dark brown, and will still have a little wobble in the middle. It will be quite soft but have faith in your convictions and get it out of the oven! The difference between soft gooey brownie and dry crumbly brownie is only a minute or two in the oven after all!
Leave to cool as long as you can before slipping the giant slab out of the tin and slicing into hearty wedges!!

You could add any kind of nuts (don't go posh though - Nigella said so!!), dried fruit such as dates or apricots, seeds, whatever really, but I like the basic recipe of dark chocolate and walnuts. The crunch is key here, the brownie should be so soft and squidgy that the walnuts give it a bit of solidity and texture...when you take a bite and find a walnut encased in soft brownie, the combination is utterly divine.


I definitely suggest making the quantity specified here - trust me, you'll never be short of takers. Intensely rich yet frustratingly moreish, these are a winner across the board. No one, and I mean no one, can resist a good old wedge of brownie.

Wednesday, 14 July 2010

Gooey Chocolate Cake


Here I am again with another Hugh Fearnley-Whittingstall recipe… I hope they aren’t getting tedious, but I just love his food as well as his ideology so much! I think I might get an ‘I heart Hugh F-W’ t-shirt printed one of these days… anyway, I digress!!

Here is another success from his Everyday cookbook, and is a little different from the normal chocolate cakes you get. It’s made with almonds in the mix which gives it a lovely moist texture as well as a sort of warm taste if you know what I mean. There’s something really comforting about almonds, and whenever they sneak in to a recipe you really can tell, there’s a certain flavour that sort of envelopes you, they make the dish that little bit more luxurious and rich without overwhelming you. I don’t know if I’m explaining this very well, let’s just say they bring a certain je ne sais quoi to the cake!!
As well as this, the cake isn’t really a cake… I’m worried I’m going to lose you here, but bear with me! This is a good thing!! Instead of a run-of-the-mill sponge, this one is kind of gooey inside due to the lack of flour and when warm it’s a little difficult to tame but wonderfully smooth, soft and sticky, and then when it’s been cooling for a few hours and comes to room temperature – Oh. My. God!! The mix of brown sugar with caster sugar gives it a wonderfully caramelly flavour and it’s like chocolate fudge encased in chocolate cake! Completely delicious and oh-so-moreish!!


Chocolate Cake:

250g dark chocolate
250g unsalted butter
4 medium eggs, separated
100g caster sugar
100g soft light brown sugar
50g plain flour
50g ground almonds


Melt the chocolate and butter in a heatproof bowl over a pan of simmering water.
Whisk the egg yolks with the sugar until well combined, then add the melted chocolate and butter to the yolk mix.
Combine the flour and almonds then fold these in too.
In a separate bowl whisk the egg whites until they form firm peaks.
Stir in one spoonful of whites to the chocolate mix to loosen it, then continue to fold in the rest of the whites, careful not to knock out the air.
Put the mixture into a prepared baking tin anf bake at 170 degrees for 30 minutes, until only just set. Take it out when there is still a wobble in the middle - this will result in the sticky gooey texture I was raving about!!
Leave to cool on a wire rack before turning out of the tin.
Dig in!!!


It isn’t decorated with anything; no frills, no frosting, nothing, and honestly – it’s at its best this way. The texture is too delicate to sustain any buttercream, and the flavour of the almonds with the chocolate really shines and would be completely overwhelmed by any heavy frosting.

I don’t think this is a special occasion cake, it’s more of an ‘I need a cup of tea and a treat’ type of cake. It’s not decadent and fancy, but humble and utterly satisfying, enjoy!!

Thursday, 1 July 2010

Hummingbird Bakery Chocolate Cheesecake


Ok, so I'm back on the chocolate bandwagon in a big big way, I know. This is possibly one of the most chocolate heavy desserts you could make, but it was a celebratory dessert!!! Well that's my excuse anyway. The oven at Colehill Kitchen has always been a bit of a disaster zone; it doesn't seem to have temperature control, so once you turn it on it just keeps getting hotter and hotter and hotter until it's like a furnace in there. This is great for bread making when you want the oven ridiculously hot, but it makes baking large cakes a real challenge (think black cinders on the outside, raw batter on the inside) and anything that needs a cool oven an absolute no-no. But a few days ago we got a new oven, YAYYY!!!! And what's the yummiest thing that needs a cool oven? Umm, hello? Cheesecake!


As well as the other Hummingbird recipes I've made, I've made this cheesecake before, about a year ago, and it really is rather huge. But it went down a storm with everyone (no surprise there really!) so I knew there would be no problem getting rid of this beast, and I was not wrong!! Despite the almost unbearable heat over the weekend, a third of the cheesecake was swiftly demolished, and now there are but a few crumbs left to prove it was ever there!!

Chocolate Cheesecake
Base:
200g digestive biscuits, finely crushed
2 tbs cocoa powder
150g unsalted butter, melted

Filling:
900g cream cheese
190g caster sugar
1 tsp vanilla extract
4 eggs
200g dark chocolate, roughly chopped


The base is your usual biscuit base. Melt the butter then mix it into the crushed biscuits and cocoa powder before pressing into a a 23cm round springform cake tin, greased and base-lined with greaseproof paper. Leave this to chill and harden in the fridge while you make the filling.

For the filling, melt the chocolate in a bowl over simmering water, then set aside to cool slightly.

Meanwhile beat the cream cheese and caster sugar until thick. Add the vanilla extract and the eggs one by one, beating until fluffy. Careful not to overdo the mixing though or the cheese may split.

Then spoon on blob of cheese mix into the melted chocolate and mix, then a couple more dollops to bring both mixes to similar temperatures, before finally combining the lot and mixing until it is all an even colour.

Pour onto the base and bake in the oven for 40-50 minutes. Check it after 40 minutes to keep an eye out for burning around the edges, and take it out while there is still a wobble in the middle. Be brave about this!! If you leave it in too long the filling will be dry and crumbly, this you do not want - smooth and creamy all the way!!

Leave to cool and ideally chill overnight...if you can hold off that long!!


This recipe from the Hummingbird Bakery cookbook is competely over the top, rich and dense but not ridiculously heavy. Perhaps not the ideal dessert for a tropically hot and humid weekend but hey, it was a special oven-related occasion!! We deserved cheesecake after all this time!!

Wednesday, 23 June 2010

Totally Wicked Chocolate Mousse Cake.


I’ve recently been on a bit of a chocolate hiatus, not for dietary reasons or any such noble cause, more because I was scrolling through my posts on this blog and noticed that almost a third of them were labelled with chocolate!! And it seemed a tad over the top to me.

How wrong could I be?! After perhaps rashly commenting in a previous post that chocolate can be a bit boring, a few of you disagreed (I take it all back!!) and I then suffered the grumpy wrath of Mr. Colehill, (a self confessed chocoholic) who demanded that the next recipe I use be chocolate based, and kindly offered up a suggestion from my ‘Bake and Decorate’ book by Fiona Cairns. The suggestion, as you can see, is probably the most rich and indulgent chocolate desert in the world; completely wicked, and completely delicious!!


This is a bake-less desert and so is really very easy to prepare, however it does demand an overnight refrigeration, which was quite the challenge let me tell you! The base is chocolate tiffin cake, and the top a surprisingly light chocolate mousse which is then sprinkled with cocoa powder to decorate. Is that enough chocolate for you?!


The recipe for the base is:

Chocolate Tiffin
100g butter
80g shelled pistachios (I used almonds because we are an almond-loving lot at Colehill Kitchen!!)
1 tblsp golden syrup
100g dark chocolate
100g biscuits (I used digestives)
80g dried fruit (dates were my choice!!)

Melt the butter, syrup and chocolate in a bowl over simmering water.
Meanwhile, chop the nuts and dried fruit, and bash up the biscuits until they are a fine crumb. Mix the fruit and nuts into the crumbs, then add the chocolate and mix well.
Press into the bottom of a springform cake tin, and leave to chill in the fridge for a few hours.

Next make the mousse topping…I say topping, but really this is the body of the desert. That’s right; the body of the desert is chocolate mousse. Cream and chocolate. On a base of more chocolate. I’m warning you, you’ll feel your arteries clogging up just looking at it.

So, on with the recipe:

Chocolate Mousse
300g dark chocolate
500ml double cream
Cairns suggesting adding a tablespoon of Kirsch or Cointreau if you like, but I completely forgot!

Melt the chocolate in a bowl over simmering water and set aside to cool.
While it’s cooling, whip the cream to a soft peak.
The trick here is to have the chocolate and the cream at the same temperature before combining them, this will stop it seizing, going grainy, curdling…all those nasty things you don’t want to happen!!
Transfer a spoonful of the cream into the chocolate and combine, then another spoonful. As the chocolate loosens up from these additions, add the rest of the cream and fold in gently until completely combined.
Pour on to the tiffin base and leave to set overnight…if you can!


When ready to serve, run a hot knife around the edge of the tin and gently open it. It may help to put a disk of greaseproof paper on the bottom of the tin so that lifting slices out is easier, but if you have a greaseproof tin (which mine is) you shouldn’t have too much trouble.


I’m going to be honest here, this is way too rich for my taste. However it went down a storm with the chocoholics in my life, and because it’s so rich it lasts a fair few servings. The soft and light mousse is beautiful alongside the more solid texture of the tiffin, especially with the crunch of the almonds you discover as you take a bite. On top of this the almonds just look wonderful, their pure cream colour speckling the rich, dark brown of the chocolate. The dates hidden in the base also give it an extra and different sweetness which offsets that flavour of the dark chocolate really well, and keeps the base from being too hard and completely solid. They also contrast nicely against the almonds, the old fruit and nut combo is an oldie but a goodie, and all this enclosed in a chocolate-y casing is heaven on my plate!


Health Warning: I do not advise trying to consume a slice this size, but hey, it’s fun trying!!

Monday, 29 March 2010

Chocolate Dipped Coconut Macaroons


I'm all for spending the weekend in the kitchen, trying out new and delicious recipes, which take time and energy. I love experimenting with more complicated dishes, (I think I get that from my Dad, he once found a recipe which required pretty much every single utensil, pot, pan and dish in the kitchen which is no mean feat considering how well equiped his kitchen is!!) but sometimes it's nice to find a recipe that requires minimum effort and produces delicious results. This is that recipe. I have honestly never made anything so simple in the hundreds of collective hours I've spent in the kitchen, and they're beautiful!! And just to add to the brilliance, no one would ever guess how easy they are!!


This is a Rachel Allen recipe, which is in her Home Cooking book. I've tried her dishes before, and I've never been disappointed, and this is another successful recipe. You throw lightly beaten egg white (just enough to 'break' or loosen it), desiccated coconut and caster sugar in a bowl, then with damp hands, mould into balls and bake for 10 minutes or so, or until golden.

Coconut Macaroons
100g desiccated coconut

75g caster sugar
1 egg white


(The one missing in the top right hand corner is because I was impatient...they smelled so wonderful and I couldn't wait to try one!!)


They need to be left on the tray to cool, as they're so delicate they will fall apart if you try to peel them off when warm. While they are cooling, melt some dark chocolate, then dip the macaroons in the chocolate and leave to set on a cling filmed surface - this makes it so easy to peel away when they're set.


I love the way these look - the contrast between the rich dark chocolate, the golden outer casing and the snowy white inside, and when you take a bite the dark chocolate compliments the sweet coconut mix beautifully.
These keep well in an air tight container, and are a delicious treat to have to hand, try them out when you have a spare twenty minutes!!

Tuesday, 16 March 2010

Cupcake City


I know, I know, more cupcakes. But really, who doesn't like cupcakes? And when have there ever been too many cupcake recipes to drool over? I for one can't get enough of these little gems, I think they're perfect for so many occasions, and are often prettier and more fun than an entire cake. So here's a couple more recipes, just for the hell of it!


This weekend I went on a bit of a cupcake bender...I decided that the best way to spend my Sunday was baking enough cupcakes to feed a sugar deficient army. And it was a fine way to spend a few hours!! I had a couple of birthdays to provide cakey goodness for, which is why I was baking in the first place, and I decided to make a selection of flavours to keep everyone happy! We had vanilla and raspberry sponge with white chocolate butter icing, dark chocolate sponge with white chocolate butter icing, and chocolate orange sponge with dark chocolate icing...so plenty to choose from, and plenty of chocolate!


All the cupcakes I made were from the Primrose Hill Bakery cookbook, which I love for the sheer volume of cupcake recipes it provides, as well as the lovely flavour combinations and more interesting and different flavours they suggest. The first lot which where iced with pastel coloured white chocolate icing were vanilla sponge with raspberry jam, which I've made before and were a real winner with everyone around! I also made a plain chocolate sponge cupcake with the same icing, which was lovely and light. The recipe is a little different to the usual cake mix, and a touch more effort, but definitely worth it, they are as light as air - which makes one feel a little less guilty when eating them...well I do anyway!!

Chocolate Sponge

115g dark chocolate
85g unsalted butter
175g soft brown sugar
2 eggs separated
185g plain flour
3/4 tsp baking powder
3/4 tsp bicarbonate of soda
pinch salt
250ml milk

Melt the chocolate, and leave aside to cool slightly.
Cream the butter and sugar until pale and fluffy.
In a separate bowl whisk the yolks for a few minutes, then add to the butter and beat, before adding the chocolate and beating.

Combine the flour, baking powder, bicarb and salt in a bowl, and add to the the mix a third at a time, alternating with a third of the milk at a time, until it is all incorporated.
With clean attachments, whisk the egg whites to soft peaks, before gently folding into the mix, careful not to beat the air out.
Divide into cupcake cases and bake at 180 degrees for about 15 minutes, or until a skewer comes out clean.
Ice with a batch of white chocolate buttercream, any colour you fancy!


The next batch were chocolate orange sponge with dark chocolate icing that really packs a punch!!

Chocolate Orange Sponge

115g dark chocolate
175g golden caster sugar
90g unsalted butter
zest and juice 1 orange - you need 75ml juice
2 eggs
185g plain flour
1/2 tsp baking powder
1/2 tsp bicarbonate of soda
1/2 tsp salt
1 tblsp milk

Melt the chocolate, and leave aside to cool slightly.
Cream the butter, sugar and zest until pale and fluffy.
Add the eggs, then the chocolate.
Combine the flour, bicarb, baking powder, salt in a bowl, and the juice and milk in a separate jug.
Add the flour mix and milk mix alternately, a third at a time, until it is all incorporated. I actually added a little more orange juice here, but this is up to your personal taste.
Divide into cupcake cases and bake at 180 degrees for about 15 minutes, or until a skewer comes out clean.

Then top with dark chocolate buttercream generously. I've found that it's really worthwhile taking an extra couple of minutes beating the buttercream, it makes for a deliciously silky smooth icing, which also looks wonderfully glossy and luxurious. I topped them with smarties for a splash of colour, but you can decorate them with whatever you like, and then enjoy!

Tuesday, 9 February 2010

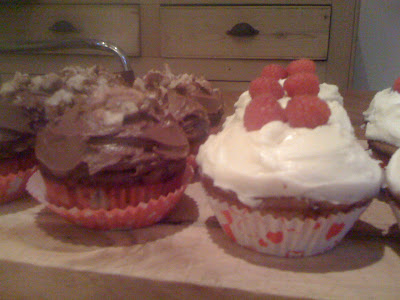
Raspberry and White Chocolate Cupcakes...and some Chocolate and Banana ones too!


Have you ever had a craving to just spend the day in the kitchen and cook all day long, or is that just me? Last week I ordered three new cookery books through no fault of my own...I had these three books in my Amazon basket, pondering which one - yes, just one - to buy, when someone (who shall remain nameless!) clicked on 'place order' when I wasn't looking. Unbeknownst to him, my card details were saved on Amazon, and the order was placed without asking me for payment or shipping details. So, now I have three shiny new books with zero guilt - because I didn't order them!! I can't be too grumpy really can I?! Anyway, They arrived last Monday, and all week I've been poring over them all week, desperately waiting for a free day to try out some of the recipes. I imagine you're interested in which books I actually bought, and if you aren't you should be...they're all beautiful books, brimming with delicious recipes.


The first was Rachel Allen's Home Cooking, an absolute gem of a book, just a delight to sit and read, whether or not you get around to cooking anything from it! Now, because I am the height of cool, I got my Post-Its out and started noting which recipes I really really really wanted to make (because I really really want to try them all, but short term this is clearly not feasible!!) and before I knew it, the book had little pink feathers peeking out from pretty much every other page, if not more!! The book is just jam packed with delicious ideas for breakfast, Sunday Lunch, Suppers, Puddings, Treats, Snacks...even Baby Purees!! You could just have this one cook book in your life and I doubt you'd ever get bored of the recipes - if only because of the sheer volume of them! Before I get completely carried away, I'll stop myself from waxing lyrical anymore, and just tell you that I ended up making one of her Stuffing recipes (because it was Sunday when I spent the day in the kitchen, and Sundays demand roast chicken), which was utterly delicious - I just wish I'd had the foresight to double the recipe - as well as her Butternut Squash Gratin. I'm actually salivating as I think about that gratin. It was so delicious, and so simple! Just bring some cream with a finely chopped clove of garlic in it to the boil, then pour over thinly sliced squash, sprinkle with parmesan, and bake for 45 minutes or so. The cream and the cheese, of course, made it a winner, but I definitely prefer it to potato gratin for the velvety texture of the squash. The orange flesh just melts in the mouth, and the sweetness from it works beautifully with the fairly subtle flavoured cream sauce and bubbly cheese topping. Five stars for that recipe!


Now, I know what you're thinking. You're wondering 'Why is she banging on about stuffing and gratin when all I can see are pictures of cupcakes?!'. Well, that is because the second book in my basket was Cupcakes from the Primrose Hill Bakery. I have about a thousand cupcake books now...I'm going to need a whole room dedicated to cupcake books one day, but they're so pretty! This is another example of a well put together book, the pictures are mouth-wateringly beautiful, and make you want to drop everything and spend hours in the kitchen whipping up batch after batch of cupcakes! (This, incidentally is what I did on Sunday...I ended up with 36 cupcakes...and only 4 people in the house). I couldn't decide on one type to make, so I settled on Raspberry and White Chocolate, and Banana and Chocolate. One word: Yum. I thought I'd found the Holy Grail of cupcakes with the Hummingbird Bakery book, I made some utterly delicious cupcakes from that book, including the Black Bottom recipe, and I'm not saying they've been beaten - but they've definitely got a run for their money!


The first batch I made were these delights - Raspberry and White Chocolate cupcakes. The batter is pretty basic - cream the butter and sugar until pale, combine the egg, milk and vanilla essence in a separate jug, and sieve flours into a separate bowl, then add the flour and liquid alternately a third at a time until everything is incorporated. This is then marbled with raspberry jam. When the cakes are cooked and cooled, you then hollow out a little well in the centre of them, and fill with even more jam!! Then cover with the ivory white chocolate buttercream icing...generously!!

Raspberry Jam Cupcakes
110g unsalted butter
180 caster sugar
2 eggs
125g self raising flour
120g plain flour
125ml semi-skimmed milk
1 tsp vanilla extract
3 tblsp raspberry jam

White Chocolate Buttercream
Make up a batch of Vanilla Buttercream by combining the following ingredients, then add 100g of melted white chocolate to four tablespoons of the mix.

110g unsalted butter
60ml semi-skimmed milk
500g icing sugar

These were certainly popular, I'd say they outdid the Banana and Chocolate batch, but this was really a question of 'which delicious cake is more delicious than the other?!!' The other delicious cake was just are irresistible - underneath a thick blanket of chocolate buttercream hid a deliciously soft sponge, laden with slightly bitter dark chocolate chunks and soft, sweet swirls of banana.

Banana and Chocolate Cupcakes
125g unsalted butter
250g caster sugar
2 eggs
1 tsp vanilla extract
250g plain flour
2 tsp baking powder
4 ripe bananas, mashed
175g dark chocolate, chopped

As usual, cream the butter and sugar until pale and fluffy, then beat in the eggs and vanilla extract, before adding the siefted flour and baking powder. When the batter comes together, gently fold in the bananas and chocolate. These, and the Raspberry cupcakes took about 10-12 minutes at 180 degrees, test with a skewer, if it comes out clean they're ready to take out of the oven.

Chocolate Buttercream
175g dark chocolate
225g unsalted butter
1 tblsp semi-skimmed milk
250g icing sugar

Melt the chocolate over a pan of simmering water, then set a side to cool slightly. Beat the remaining ingredients together, and when smooth, add the melted chocolate to create a delightfully decadent and sinful bowl full of glossy goodness!! When cooled and iced, sprinkle a few chopped walnuts on top if you like (for the healthy element you see...)


I've well and truly got the cupcake bug again...I'm just warning you, it could result in an inordinate amount of posts on these little beauties, not that you'd complain I'm sure!! There's something so dainty and civilised, yet greedy and naughty about cupcakes, that they are completely irresitible. I can't think of anything I'd rather have as a treat, or what I'd rather give as a home made gift, or offer to guests...they fit every occasion, and everyone gets so excited by them!! There's nothing better than making someone smile with something you've made, and cupcakes seem to win every time. They're perfection in a paper case!